Installation Instructions
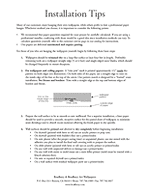
- We recommend that paper quantities required for your project be carefully calculated. If you are using a professional installer, conferring with them would be a good idea since installation methods can vary. To calculate quantities yourself, visit https://bradbury.com/measure.html
- Our papers are delivered untrimmed and require pasting.
- Wallpapers should be trimmed dry on a large flat surface at least six feet in length. Preferable trimming tools are a wallpaper straight edge (5 or 6 foot) and single-edged razor blades, which should be changed frequently to ensure sharpness.
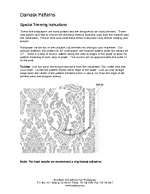
- For wallpapers and ceiling papers: A "trim join" mark is printed approximately 1/2" inside the pattern on both edges (see illustration). On both sides of the paper, use a straight edge to trim on the inside edge of the line at the top of the arrow. Our pattern match is designed for a "butted" seam installation. For friezes and borders: Trim with a straight edge at the top and bottom edges of borders and friezes.

- Prepare the wall surface to be as smooth as new wallboard. For a superior installation, a liner paper can be used to provide a smooth, receptive surface for the pasted sheet of wallpaper, to minimize seam shrinkage and to absorb excess moisture allowing the finish paper to dry quickly.
- Wall surfaces should be primed with an acrylic primer and allowed to dry completely before beginning installation:
- For bare drywall, joint compound and patched surfaces: Prime with Zinsser Gardz (acrylic sealer) followed by a coat of Zinsser Shieldz (acrylic primer)
- For previously painted surfaces (including oil-based products): Prime with Zinsser Shieldz Universal Wallcovering Primer or other high-quality white-tinted acrylic primer
- Previously papered walls should be stripped, washed, patched, sanded, dusted and primed with Gardz and then Shieldz
- We recommend using a quality clay-based adhesive. Products that have been used successfully include:
- Suregrip #134 or #138 (Zinsser)
- Pro #732 or #774 (Roman)
- Shur-Stik or Dynamite #111 or #433 (Gardner-Gibson)
- Pro-Fit - powdered starch paste (Available from Bradbury)
- Golden Harvest wheat paste (powder) or GH-34 Pre-mixed Wheat paste
For a list of online paste sources go to https://bradbury.com/pdf/PasteResources.pdf
Please take the time to pre-test the compatibility of the adhesive you choose with our paper, allowing the paper to dry completely, to ensure that the adhesive is performing satisfactorily. Be sure to read and follow the adhesive manufacturer's directions.
"Clear" adhesives cause staining on some papers and are not recommended.
- Use a short-nap paint roller to spread the adhesive in a thin, even coating across the back of the paper. After pasting, fold the paper back (pasted sides together) and allow to set for 10 minutes or so before hanging (just until the paper is relaxed). This "booking" allows the paper to absorb moisture and to expand fully.
- Paper does not require a lot of pressure during installation. Use a soft bristle wallpaper smoothing brush, smoothing from the center out, to expel air bubbles. After the adhesive has set (5 - 10 minutes), secure the seam with a wooden seam roller. Avoid excessive smoothing, or seam rolling.
- During and after hanging, be certain all adhesive residue is completely wiped from the surface. Leftover paste may stain the surface of the papers. It is important to use a damp sponge or soft damp towel and clean warm water. Dry with a clean towel. An extra-absorbent microfiber towel is recommended.
Please note that water will not remove the inks we use to print the papers, but excessive use of water can re-activate the paste underneath causing seams to split. Also, avoid rubbing too hard, which can burnish the surface.
If you or your paper hanger have any further questions, call (707) 746-1900 or email beverly@bradbury.com. To find a professional installer in your area, we recommend contacting the Wallcovering Installers Association at www.wallcoveringinstallers.org.
For a printable version of this page: Paper Installation Instructions


